|
| Trying to hold back the tide. |
After Andrew Rolph's series of scenarios published in Miniature Wargames in 2016, the guy has gone on to produce another set of 6 scenarios. The new series appears in The Society Of Twentieth Century Wargamers publication, The Journal, under the heading of Red and Gray. Well I enjoyed the first lot so I decided to give the new set a try.
Here's my Battle Report of the first of the series, using Blitzkrieg Commander II by Specialist Miniature Publishing.
Red and Gray - Part 1 - Brasvinech
Background
23 June, 1941 and Operation Barbarossa started yesterday. The Germans want swift advances with their armour, and not to get held up taking individual towns. The plan is to screen and bypass towns with the armour where possible and leave the infantry to deal with any resistance.
One such town is Brasvinech.
Layout
The layout is a long thin table with Brasvinech in the North West corner (top right) and the German Deployment Zone South in the West (top left).
It's worth noticing the four bridges now. They play an important part in the battle.
- There is a "bridge" that the Germans have to cross from their deployment zone in the top left, to head East (this way).
- There are two over the river bordering the town of Brasvinech at the far end, that the Soviets have to cross to get out of the town.
- There is another bridge exiting the table in the North East (bottom right).
Objectives
The Germans objectives are to screen and bypass the town. To do this they start in the South West (top left) and have to try to exit over the bridge in the North East (bottom right). Some Victory Points are also available for enemy units destroyed.
The Soviets objectives are to destroy as many German units as possible and to break out of Brasvinech and create a defensive position to the east of the town.
OOBs (Order Of Battle)
Germans:
Panzer Battalion
Gepanzert Infantry Battalion with 3 halftracks, a StuG III and a PzJag I
Motorcycle Infantry Battalion
2 Stuka Missions
Artillery controlled by FAO with 5 turns of ammo.
Soviets:
Tank Battalion
3 Infantry Battalions with supports
Artillery with limited ammo.
Deployment
Brasvinech is crammed with two Soviet Infantry Battalions and a Tank Battalion. There is also an infantry battalion covering the approach to the bridge in the north east that the Germans are heading for. I didn't have enough T-28 models so some of them are represented by BT-7s.
All German units have to start from the two roads entering from the south west corner.
 |
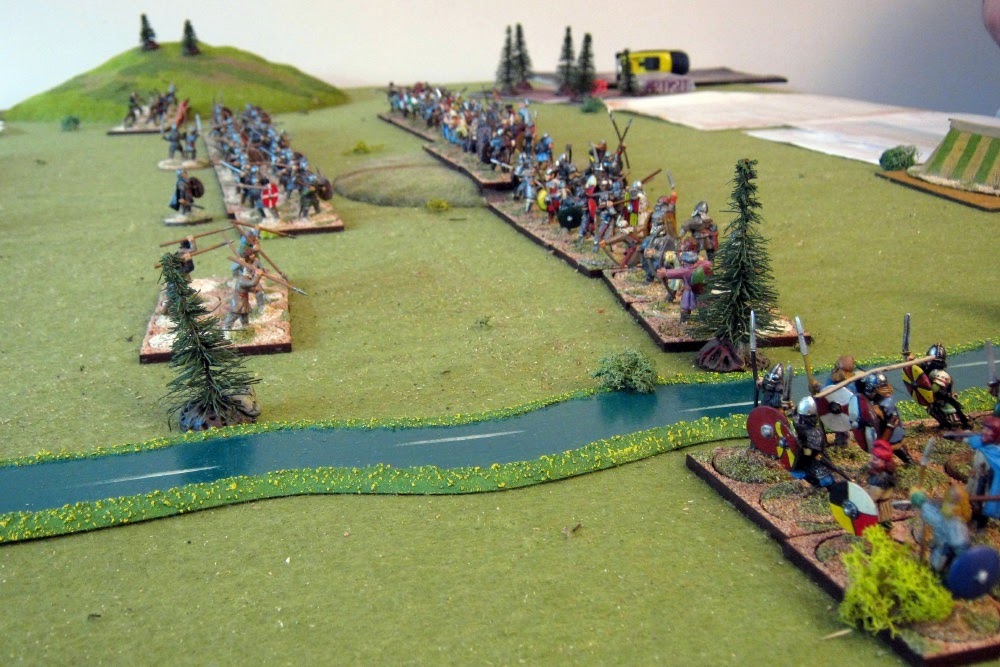
Brasvinech is crammed with Soviets.
Dense formations of Germans queue to cross the river. |
The German Panzer Battalion make a break east across the bridge.
Soviet heavy tanks move to the edge of the town and fire on the column, while T-28s cross the bridge out of the town of Brasvinech to try to intercept the panzers.
 |
Soviet heavy tanks hit the flank of the Panzer column
as they try to pass Brasvinech |
The Gepanzert Infantry Battalion move up to screen the south of Brasvinech. The
StuG III and PzJag I hit the flanks of T-28s crossing the bridge eastwards.
 |
By return, the StuG and PzJag hit the T-28s that
are crossing their bridge in the flank. |
The destructive fire from the Soviet tanks forced the panzers to take up defensive positions and try to engage them while the Motorcycle Infantry Battalion start to cross the bridge.
Meawhile the StuG III and PzJag I have already come under heavy fire and been destroyed.
 |
As losses mount, the German Panzers have to
take cover and engage the Soviet tanks. |
The Soviet tanks had a BA-6 Armoured Car Recce Unit helping to boost their Command Roll. This helped them a lot - until now.
German artillery support arrives hitting the Command Stand and finishing off the BA-6.
 |
| The Soviet Recce A/C is destroyed. |
Motorcycle Infantry Battalion bypass the panzers and head east.
A lucky Soviet artillery burst caught the motorcyclists lagging behind.
At last the German Stuka is successfully called in causing more damage to the Soviet tanks crossing the bridge and very nearly taking out their Command Stand (on 5 hits).
Rather than trying to pass the Soviets in the woods on their vulnerable bikes, the motorcyclists dismount and take them on.
Another Stuka attack, with a direct hit this time.
A Soviet artillery hit on the panzers means another loss, causing their third Morale Throw.
which they fail. Exit the rest of the panzers.
The motorcycle battalion have almost neutralised the resistance in the woods and first farm.
Part of the Gepanzert Infantry Battalion mount the 3 halftracks and head east for the far bridge.
... and break through the woods.
One is destroyed, one has been suppressed, but one makes it to the bridge
Soviet infantry cross east to achieve their objective of holding ground to the east of Brasvinech, but a single suppressed unit on the bridge halts progress.
T-28s encounter infantry in the farm and decide they can overun them.
A Close Combat follows.
One T-28 destroyed ...
... followed by another finished off with an anti-tank rifle.
This now forces a Morale Throw for all the Soviet tanks, which they fail and the rest rout from the battlefield, leaving just infantry and some guns for both sides.
Most of the motorcyclists remount and move around the smaller village
... and head for the bridge, but come under Opportunity Fire and further ordered fire.
The German CO had moved up to urge the motorcycles on, but a Command Blunder makes him retreat off the table, which effectively ends the Germans attempt to move more units off the table.
 |
The German CO retreats off the table as the result of a Command Blunder.
This effectively ends the German attempt to get any more units across the last bridge. |
Thoughts
The tank battle was much more protracted than shown here, but I've given the nuts and bolts.
The panzers tried to use speed to get past Brasvinech, but got caught by the Soviet heavy tanks.
With the help of the BA-6 Recce Unit, the Soviet heavies did really well to stop them.
One unusual thing was that the Soviet tank battalion almost lost its HQ to artillery and airstrike. That would have been pretty disastrous.
Stopping the German motorcycle battalion to engage the infantry in the centre was borne out of a previous experience of trying to bypass infantry on vulnerable motorcycles. That did work out quite well but most got stopped on the last leg.
An interesting and enjoyable game with several options for each side. Well worth a go.