 |
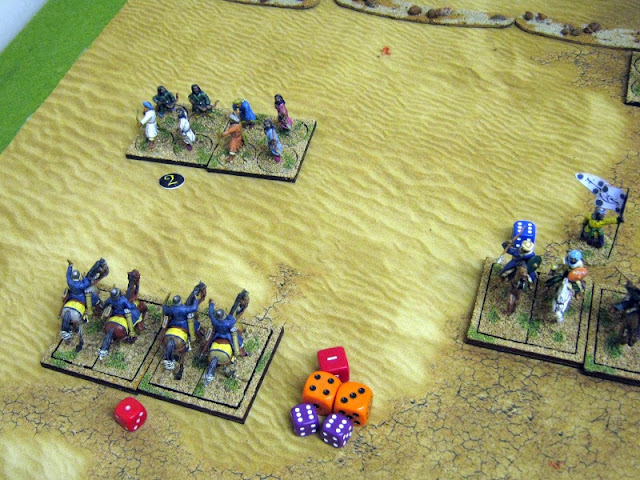
| Crusader cavalry try to repel Saladin's attacks |
This battle represents the early stages of the battle just after Saladin launched his attacks from the wood on the rear of the column. Historically the cavalry on both sides was deployed behind the infantry and when the attacks were launched there was some confusion as the cavalry pushed through the infantry. Rather than trying to resolve this on table I've assumed that stage is over and each side can deploy within their deployment zones as chosen.
I used Sword & Spear rules.
Rather than have one large army on each side, I tried representing the two rear columns of Crusaders as two separate armies, and similarly for the Ayyubid Egyptians. This gave two armies on each side of about 290 points and 8 units each.
LAYOUT AND DEPLOYMENT

North is at the top of this layout.
Crusaders on the left defending against Saladin's attacks from the woods on the right.
Saladin chose this place for a major attack because the woods gave a covered overnight camp and approach, while the battleground was relatively open and suited to cavalry attacks.
ORDER OF BATTLES
Crusaders - Army 1
General, 2 x Knights, 1 Miltary Order Knights, 1 x Spearmen, 1 x Crossbowmen, 1 x Miltary Order Searmen, 1 x Archers, 1 x Turcopole Cavalry
Crusaders - Army 2
General, 1 x Knights, 1 Miltary Order Knights, 2 x Spearmen, 1 x Crossbowmen, 1 x Miltary Order Searmen, 1 x Archers, 1 x Turcopole Cavalry
2 Ayyubid Egyptian Armies - both have the same forces
General, Captain, 1 x Cavalry, 2 x Ghilmen, 1 x Turcoman Light Horse, 1 x Turcoman Cavalry, 1 x Ahdath Militia Spearmen, 1 x Archers Light Foot, 1 x Javelinmen
THE BATTLE
Initially the cavalry on both sides closed the gap.
The Crusader Knights have the Impact ability which gives them an advantage if they actitvate and charge in first in the next turn. If the Egyptian Ghilmen get to activate first they can either loose arrows or charge first and negate the Impact ability of the Crusader Knights.
In the north, Crusader Turcoploes have an early success scoring three hits against Turcoman Light Horse and immediately destroying them.
Early in turn 2 the Turcoples follow this up with another success, knocking out a unit of Egyptian Archers. Each time a unit is lost from an army they lose an activation dice, so the northern Egyptian army is already down from 8 to 6 activation dice.
Cavalry charge in right across the battlefield with the Egyptians managing to avoid the worst effects on the Crusader Knight's Impact ability.
The troublesome Turcopoles in the north have made their way round the flank of the Egyptians and are threatening their supporting infantry, but they are being cut off by Turcoman Cavalry.
Turn 4 and there are several decisive combats.
One unit of Ghilmen is lost from the Southern Egyptian army.
Followed by one from the northern Egyptian army
A unit of Crusader Knights are lost from their northern army.
An overview at the end of turn 4 and gaps are appearing in the Egyptian lines.
Skirmishing at the southern end (this end) of the battlefield was inconclusive all game.
In turn 5 Military Order Knights break another unit of Ghilmen ...
... but suffer in their pursuit when they hit a unit of Spearmen, just managing to avoid being destroyed with their Armour negating one hit.
A unit of Egyptian Cavalry are utterly pounded by some Military Order Spearmen.
The northern unit of Turcopoles are finally caught in the flank and destroyed in an act of Egyptian defiance.
More Ghilmen are destroyed.
Followed by a unit of Saladin's Turcoman cavalry in the south
At the end of turn 5 the Egyptian southern army is demoralised and quits the field leaving 4 units in their northern army to face two strong Crusader armies.
Battle over with the southern Crusader army off to cause trouble in the Egyptian rear.
WINNERS AND LOSERS & THOUGHTS
An obvious victory to the Crusaders but it wasn't as one sided as it might appear. The early success of the Crusader's Turcopoles in the north meant the Egyptians lost 2 activation dice early on which put them on the back foot.
The Egyptians were very unlucky in several of the cavalry combats and should have done better, but it wasn't helped by losing several activation dice early on leaving them with fewer options.
There are rules at the back of the Sword & Spear rules for multi-players and armies and as I had 2 vs 2 armies I drew 13 dice from the dice bag each phase. Many of the units were high value so even at nearly 300 points each there were only 8 units in each army. I might have been better drawing 11 dice per phase.
Good fun though and the result was fairly historical.


Nice to see a Sword and Spear game running. I have the rules. I thought about putting 28mm figures on 80mm bases, a sort of compromise between charming figures and footprint. I realise this is the 15mm base size, I think the smaller units will look fine to my eye and your game helps reinforce that in my mind.
ReplyDeleteWill be fine with 80mm bases. Ranges are measured in DU (half unit width) so whatever suits you best.
Delete..... and that is a very effective mat!
ReplyDeleteThat's the 6'x4' Desert Mat from TinyWargames. Not cheap but very nice.
Delete